Dry equalisation for freediving at beginner level (2/2)
Apprendre la compensation à sec en Frenzel
Part 2: Frenzel
This document is the continuation of: "Dry equalisation for freediving at beginner level (1/2): volumes and locks »
We saw that among the possible compensation methods (beginner level):
- one should forget Vasalva
- the "hands free" method is a possible solution but not accessible to everyone
- Frenzel is the preferred solution for a beginner
- there is no point looking at the Mouthfill until you are comfortable at 30-35m
- (down to 30-40m)
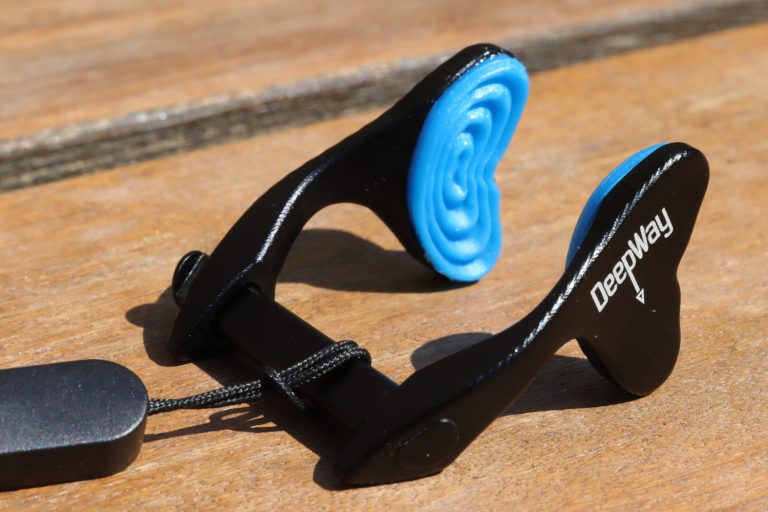
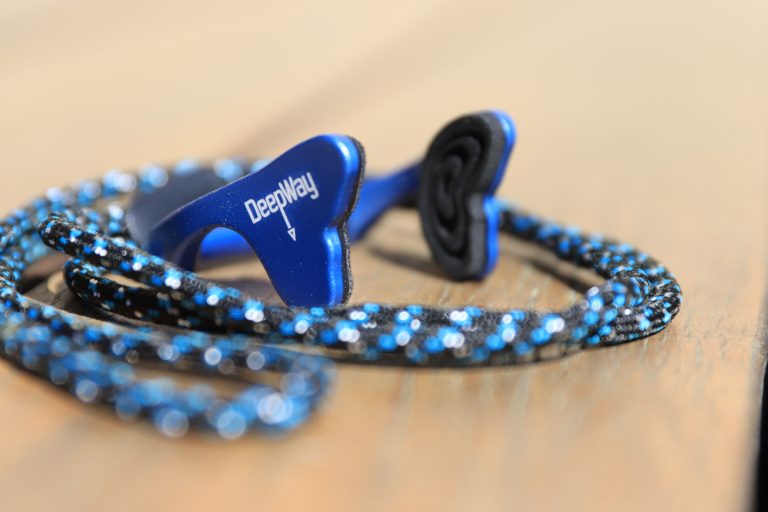
Required accessories
- Dry trainer or Otovent (see previous document if you don't know what it is)
- mirror (or phone camera)
Vasalva versus Frenzel
The vasalva maneuver is well known to scuba divers. This is usually the only one you learn in scuba diving because it is easy to do. Unfortunately this ease means that very few scuba divers learn other methods (why bother since this one works?)
Personally I regret it, because Vasalva is often used too aggressively. We have plenty of air at ambient pressure in our lungs and we abuse it. The result: too many professional divers end up half deaf. However, there are two solutions:
- Learn Frenzel for scuba diving
- or at least learn to dose much more your Vasalva
In freediving, we do not have a regulator (the thing in the mouth) bringing ambient air as desired. As a result : in freediving, Vasalva does not allow you to go more than 8-10m.
The solution is "easy": learn Frenzel!
How to equalise with the Frenzel method?
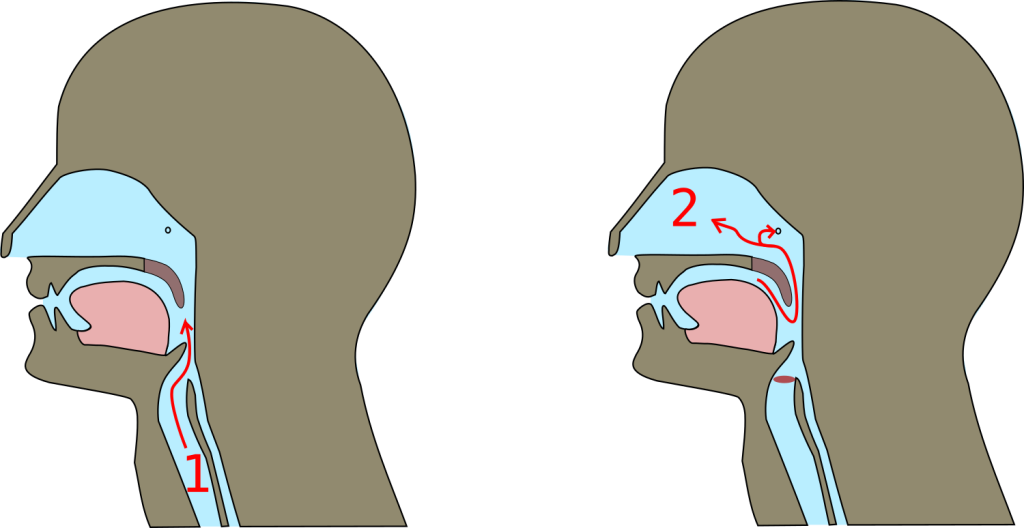
Unlike Vasalva, which is done directly from the lungs to the ears, the Frenzel method is split into two stages:
- The load : Nose pinched, we move air from the lungs to the mouth, then we close the glottis.
- The equalisation : Glottis closed, soft palate open and nose pinched, we use the tongue to reduce the volume of the mouth, which increases the pressure in the nasal cavity and sends air into the middle ear (via the fallopian tubes). eutache)
Step 1: the N charge
We generally use what we call “ N charge »:
Glottis closed , nose pinched, gently fill the mouth while pronouncing the sound "NEEEEEEEE" or "NAAAYYYYY". This will barely open the glottis, just enough to let in a little air and then close it immediately. Do not hesitate to be sonorous, because it is the air passing over the vocal cords that produces this sound.
Notice: Unlike the Mouthfill M filler (for those who know it), the N filler hollows slightly the cheeks instead of filling them. We therefore recover less air, but the goal here is to recover enough air with the least effort, and not to inflate the mouth as much as possible.
Exercice 1 :
- Partially or completely fill the lungs, pinch the nose
- Bring air from the lungs to the mouth, using an N load. Don't be afraid to be loud.
- Let go then pinch your nose again: the overpressured air escapes
- New N load N (without taking air)
- Let go then pinch your nose back
- Etc until the lungs are empty
Repeat the exercise several times
Exercice 1B : same game, but keeping the air in the mouth for 10 seconds after each charge.
Exercice 1C : If you already know how to do a T lock (see next chapter!), repeat the same exercise but with your mouth slightly open, your tongue sealed on the upper teeth in a T lock
Notice: as seen in the photo, the cheeks are slightly hollowed during an N load.
Step 2: the equalizing
The goal is to control the tongue to reduce the volume of the mouth.
For Frenzel, the compensation is done using a tongue movement called the T lock.
- It corresponds to the “TH” sound of the word "think" .
- Notice that by doing so, you crush the tip of the tongue on the upper teeth
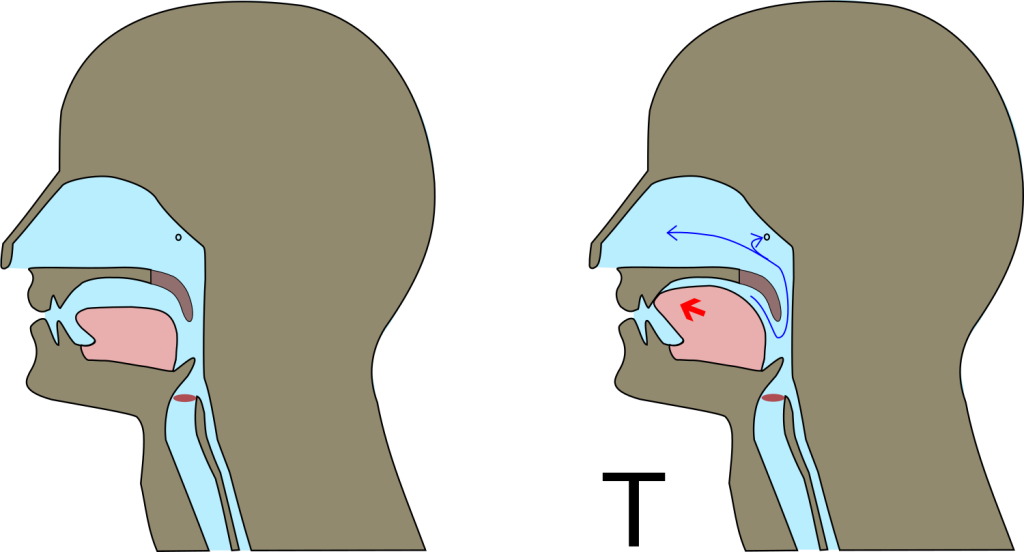
Tongue in neutral position and in T lock.
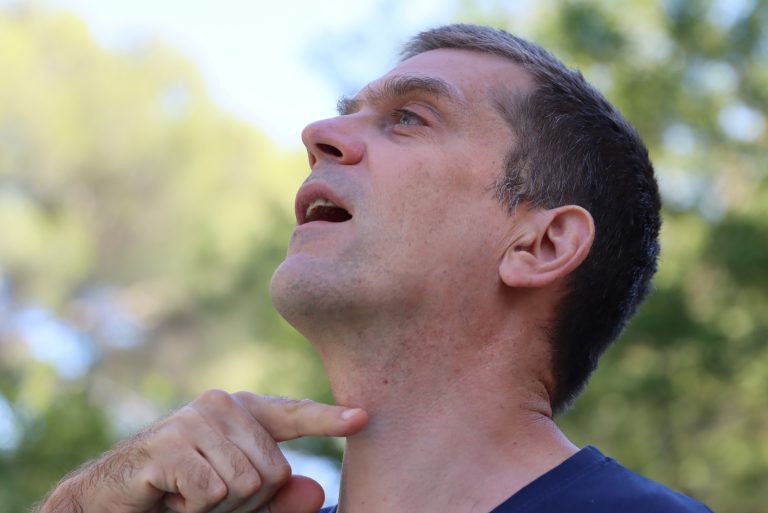
Exercice 2 :
- repeat series of “THICK-THICK-THICK” , making the corresponding sound
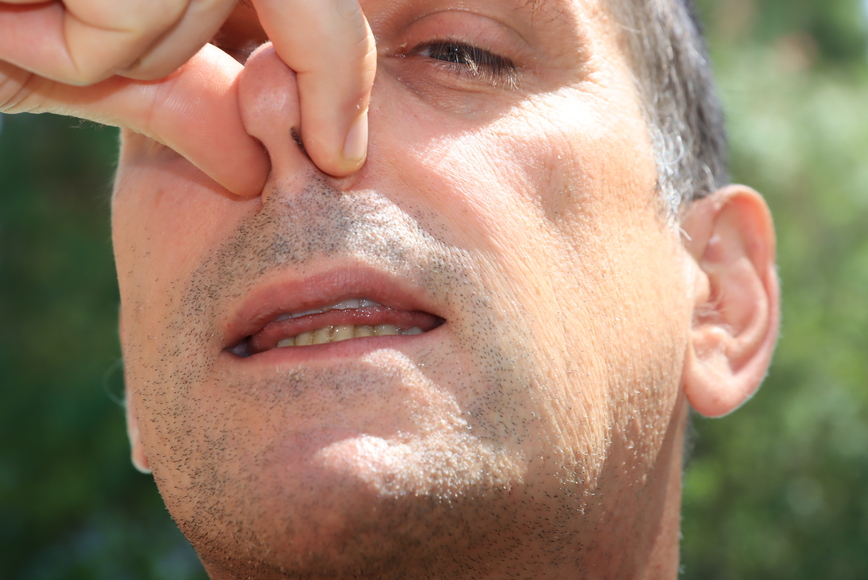
- do it again, in front of a mirror, nose pinched, mouth open, trying to be tight with your tongue on your teeth, and sending very little pressure.
- no air should escape despite the mouth being open
- You should not produce any more sound!
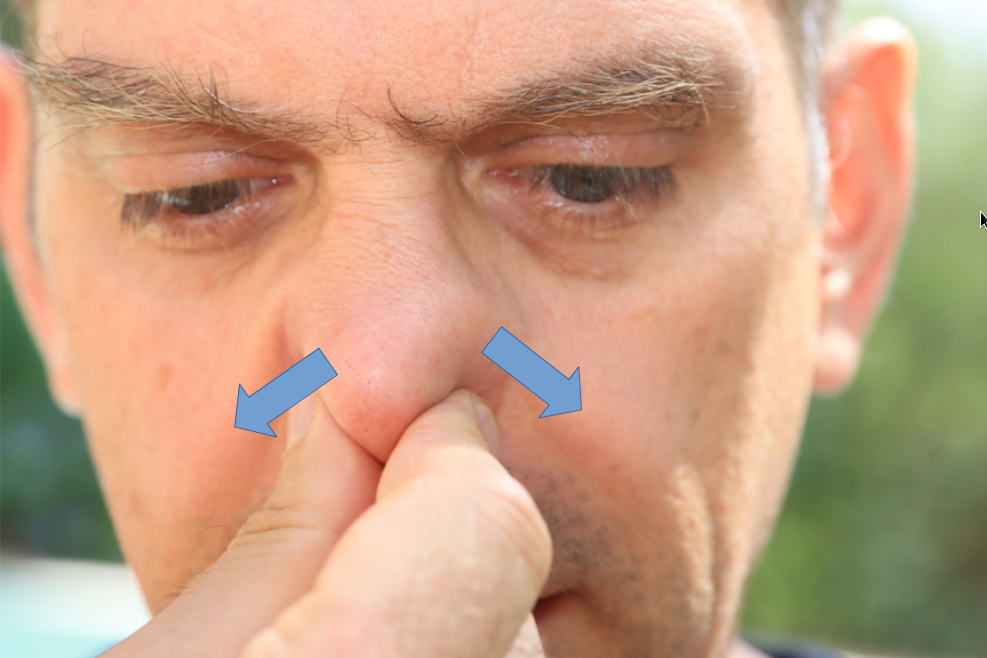
- looking in the mirror, you should notice two small bumps on your nose, just behind your fingers: this means that the pressure in the nose has increased.
Exercice 2B : do the same excercice, but with only one movement of the tongue, gradually pressing a little more on the teeth. You should eventually identify a "poc" in the ears: Hurray! You have equalised!
No need to put more pressure. It must not be painful!
Practice regularly until it becomes automatic. You must try to feel rather than to be consciously aware of each action
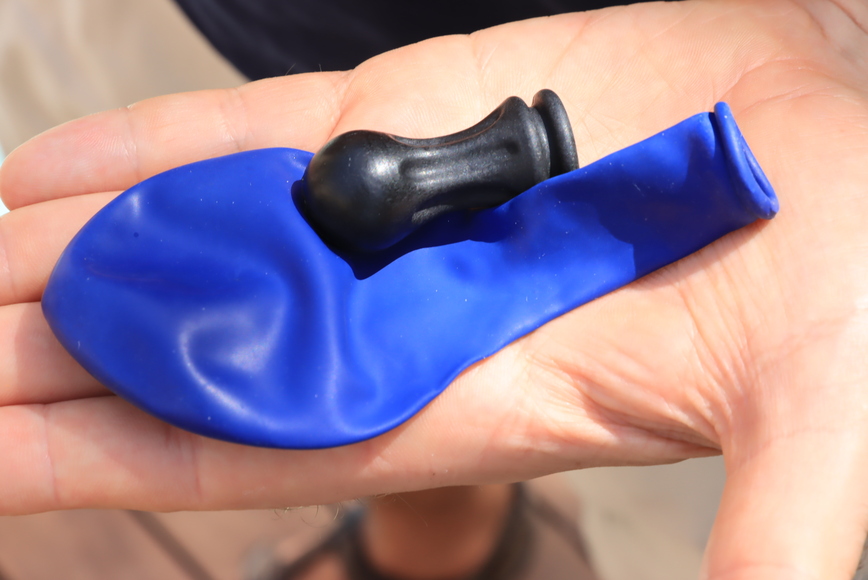
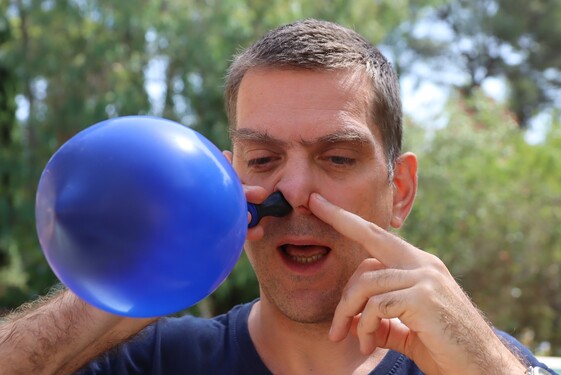
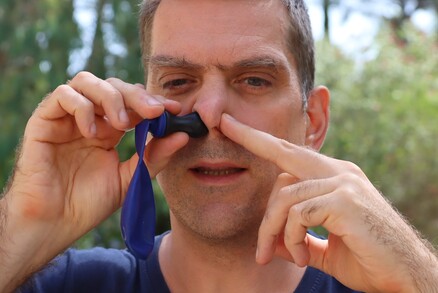
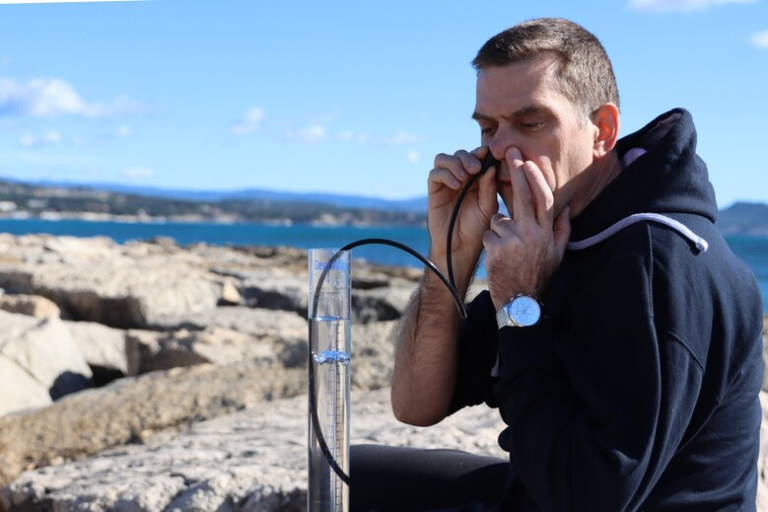
Exercice 3 : You will need a dry trainer or an otovent. You can order a dry trainer on this website or look for an otovent in a pharmacy or on the Internet (see the previous document for more details on its first use)
Place the balloon on the mouthpiece (between the two grooves), then:
- place the tip on one nostril, balloon deflated. The contact on the nostril must be airtight.
- block the other nostril with a finger
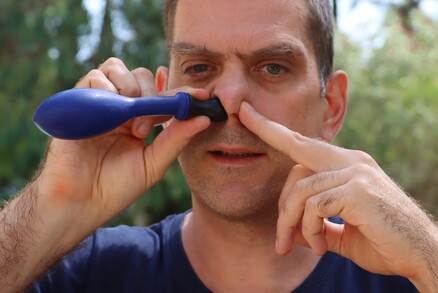
- Take a partial or full breath
- inflate the balloon gently using a Frenzel (T, K or H bolt). The balloon stands up and then inflates a little.
Notices:
- If the balloon is too stiff, you may not be able to inflate it. If it's painful, don't insist!
- The advantage of this exercise compared to the previous one is that it allows you to “quantify” the effectiveness of each lock (T, K, H): The more the balloon inflates, the more effective the lock is.
Exercice 4 : Once the previous exercise has been mastered, if you have a swimming pool or are in a freediving club, you can do it again in the water in a "bat" position (calves out of the pool, head down with back against a vertical wall of the pool). The interesting thing is that you are in the water, and upside down (as you will be in the sea). As always in freediving, don't do this exercise alone! Someone must be next to you, ready to help you.
You can also try to do this exercise in a public swimming pool during a public session, but I wish you good luck to explaining to the pool supervisor what you are going to do. I’m not sure he will agree… :-)
To go further…
Once you have mastered all this on dry land, all you have to do is practice in open water
Rule 1: NEVER ALONE ! This does not mean that a friend is watching you from the other end of the beach but that he is with you, in the water, attentive to what you are doing, and that he is also able to go down if necessary.
Rule 2: On travaille la technique (donc la qualité), et pas la durée d’apnée. Especially since it is important to be relaxed. You must therefore be on fairly short freedive times compared to what you would be able to achieve.
Rule 3: control your descent. The best solution is to descend along a vertical cable, pulling yourself with your hands. So without finning. Good news, all freediving clubs have a cable! The advantage is that if there is the slightest problem, you can stop your progress without getting hurt.
Rule 4: An equalisation must always be done gently. Never force! If an equalisation does not work, stop your descent, possibly stay in place for 5-10 seconds to try to get an equalisation to pass (by changing the technique: head position, jaw position, etc., but not by forcing), then in any case stop your dive and go back to the surface.
Rule 5: do not go beyond the last equalisation. You are here to work the technique, not to break a record…
bonjour ,les exercices existent en videos ?
Bonjour. Pas actuellement, mais c’est en projet pour la fin de l’hiver.