Dry equalisation for advanced freedivers (1/2: Mouthfill)
This document is a continuation of: " Freediving equalization, dry training beginner level part 2/2: Frenzel "
We saw that among the possible compensation methods (beginner level):
-one should forget Vasalva
-the "hands free" method is a possible solution but not accessible to everyone
-Frenzel is the preferred solution for a beginner
-there is no point looking at the Mouthfill (=Frenzel Fattah) until you are comfortable at 30-35m
New step: Now that you are around 35m, it is time to consider switching to mouthfill.
Required accessories:
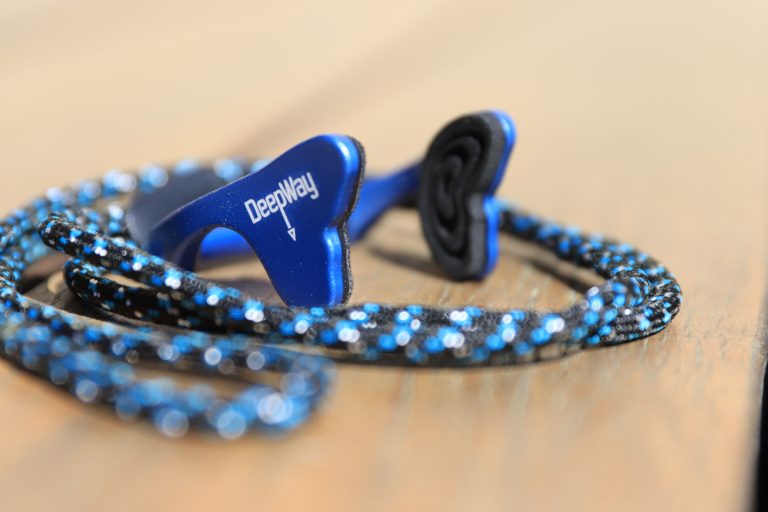
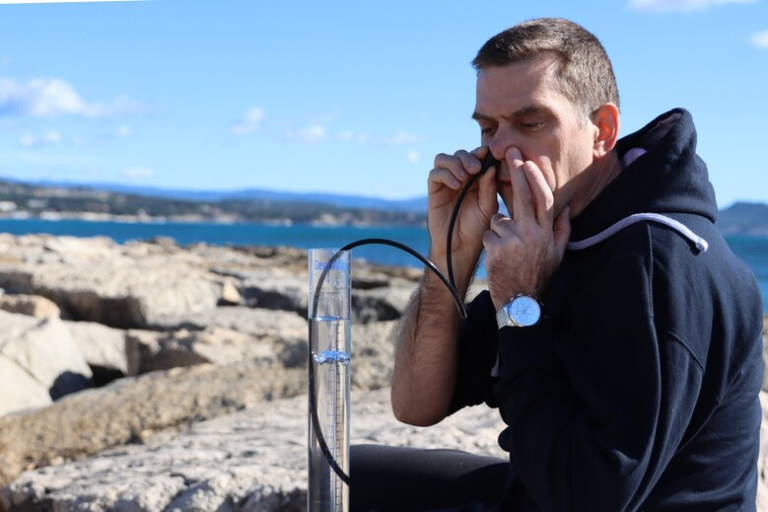
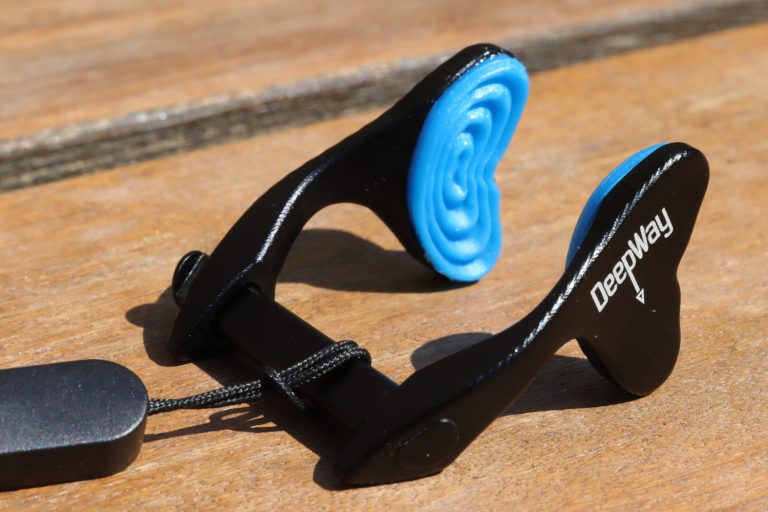
-Dry trainer or Otovent (see previous document if you don't know what it is)
-mirror (or phone camera)
Principle
The mouthfill (also called " Frenzel Fattah » is, as its name indicates, an evolution of the Frenzel method by Dr. Fattah, in order to reach greater depths.
The principle is the same, with a greater quantity of air in the mouth. This allows you to make your last charge at a shallower depth (generally around 15m, and maximum around 30m for experts) and keep it all the way down (more than 100m for the best)
In other words, the second difference between Frenzel and mouthfill, apart from the quantity of air recovered with each load, and thatwe will perform less charges (but more or less as many compensations!): A small charge on the surface, a second small one a few meters away and a last one (the “real” charge) around 15m. Another solution is of course to use frenzel from 0 to 15m then a single mouthfill charge…
Why learn Frenzel first, when you're a beginner, and not directly the mouthfill?
-because the mouthfill is more difficult to manage (greater pressure in the mouth). The slightest poorly controlled problem (aquacity, finning, stress) will make you to lose the load, and you will be too deep to do another one
-because everything you learn for Frenzel will also be used for the mouthfill, and Frenzel is enough to make you go down to more than 30m
-and finally because the mouthfill might making you progress too quickly and go lower than depths you can cope safely.
The locks
There are mainly 3 possible positions to lock the tongue: T, K, H. For Frenzel, only one lock is enough (usually the T lock).
For the Mouthfill, we can initially settle for just one lock (T). But a succession of three locks allows you to make some additional compensations with the same volume in the mouth, and therefore to gain a few meters.
Exercice 1 : Say “PAY-PAY-PAY-TEA-TEA-TEA-KAY-KAY-KAY-RAY-RAY-RAY” several times and identify the tongue movements and where it goes. Do not cheat ! Try to find it yourself without reading the solution below. You can try to guess either by feeling or by looking at yourself in front of a mirror...
Solution :
– PAY-PAY-PAY: the tongue is at rest, in a low position. She doesn't move (it's the lips that make noise while expelling air
-TEA-TEA-TEA (like a cup of TEA): the tip of the tongue will press against the upper teeth
– KAY-KAY-KAY: the tip of the tongue will come up against the bottom teeth
– RAY-RAY-RAY (like X-RAY): the tip of the tongue remains in the center. In fact, it goes against the back of the mouth
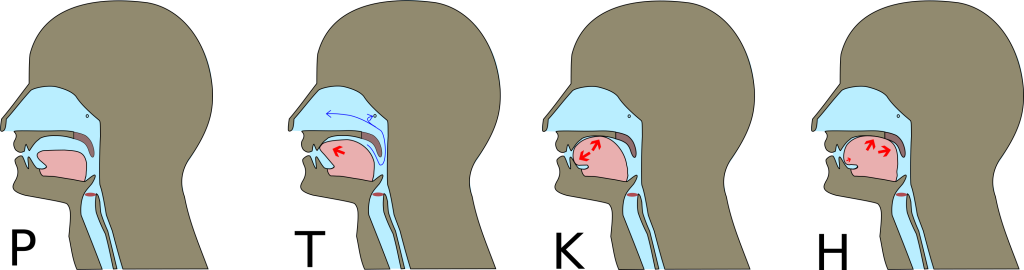
These 4 sounds correspond respectively to: The neutral position of the tongue (P), the T lock, the K lock (or KAY or KEY), the H lock (or GAY or RAY).
Exercice 2 :
–Pinch your nose with your fingers
-empty your lungs (partially or completely) and close the glottis (see lesson 1: “How to control your glottis”).
-mouth open, do very little Frenzels by looking at yourself in a mirror, making small jerks with your tongue in position T, K, H: in all 3 cases you should notice a small bump on each side of the nose. This means that pressure increases in the nose.
Note: Make sure your rib cage is relaxed, and does not move.
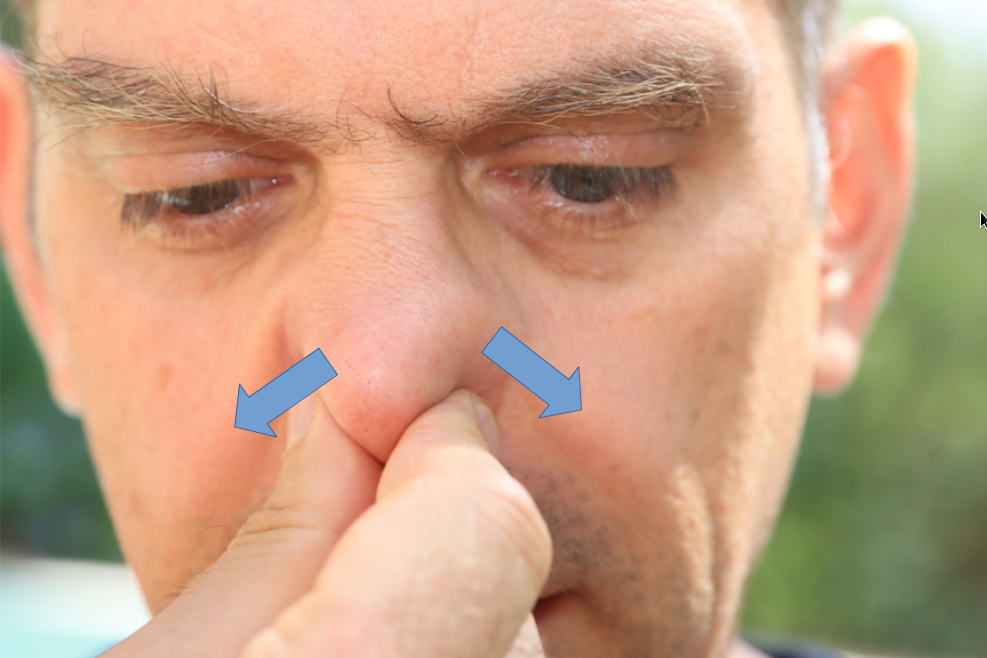
Exercice 2B : Repeat Frenzel, increasing gradually the pressure. You should eventually ear a “Poc” in your ears. Do not increase the pressure any further. It must not be painful.
Repeat this exercise several times. As the weeks go by, this should become a “reflex” act.
The M charge
While the “classic” Frenzel is done with a N load (or a reverse carp), the mouthfill is done with a M load. The principle is the same, but the air is moved from the lungs towards the cheeks by pronouncing MEUHHH” (like the cow) or “HEUMMMM” (a bit like the OHMMM of yoga), instead of NEEE.
While doing this:
-raise your head gradually, as if you were looking at the sky
-gradually move your jaw forward and down (while keeping your mouth closed)
-keep your tongue relaxed, placed at the back of the mouth, the tip placed against the lower teeth (without leaning on it)

Notice: while the N load slightly hollows the cheeks, the M load inflates them like a hamster.
Exercice 3 : Pinch your nose and try to do M loads. Begin with moderate loads, then increasingly stronger (without exceeding the pressure you use in Frenzel). It musn't be painful.
Notice: After a certain increase in pressure in the mouth, you may ear a "poc" in the ears: the mouthfill generating a higher pressure, it will be enough if it is well done to achieve an initial compensation.
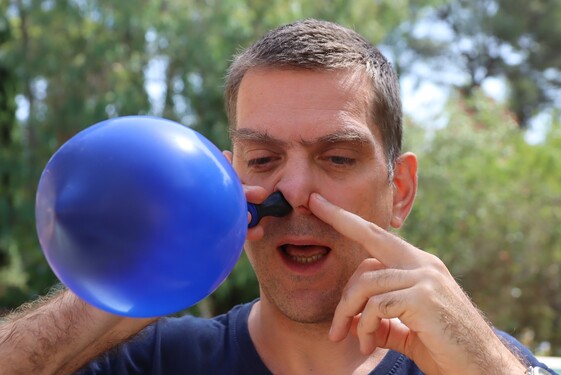
Exercice 4 : You will need a dry trainer or an otovent. Consider choosing a very soft balloon. If you buy directly from the Otovent brand, I advise you not to use the balloons supplied with them because they are much too stiff (they are not originally intended for freedivers but for a medical use). If the balloon is new, you should inflate it 5-6 times before starting, in order to relax it. Place the balloon on the tip, then:
-place the tip on one nostril, balloon deflated. The contact on the nostril must be airtight.
-block the other nostril with a finger
-Take a partial or full breath
-inflate the balloon gently using a Frenzel (T, K or H bolt). The balloon stands up and then inflates a little.
-Release your tongue, the ball goes back down
-Redo your lock: it goes up again
-and so on...
Exercice 4B : Do the same excercice, but preceded by a M load. Keep the ball erected for at least 10 seconds thanks to the load (cheeks inflated)
Notices:
If the balloon is too stiff, you may not be able to inflate it. If it's painful, don't insist!
-The interest of this exercise compared to the previous one is that it allows you to “quantify” the effectiveness of each lock (T, K, H): The more the balloon inflates, the more effective the lock is (even if the difference is not always very visible!). In addition, waiting 10 seconds makes you work on the duration: the ball must remain of a constant size, without moving back and forth.
Exercice 4C (optional because it is difficult to master at first)
-Still using a Dry Trainer, do a Frenzel in T lock. The ball stands up.
-Hold the lock, tongue on the upper teeth, and gradually lower the tongue on the lower teeth (lock K).
-Then bring your tongue backwards, to the H position.
The complete mouthfill
Exercice 5 :
-pinch slightly your nose, letting a little air escape
-do a full M load and stay with your head raised and your jaw relaxed: it is possible that a little air escapes
-gently lower your head (chin towards the top of your chest): you should feel that the pressure increases further in your mouth, until a little air escapes again
-force on the cheeks: air escape again
-Make a series of T locks: each lock will release a little air
-When, due to losing air, you are no longer able to increase the pressure sufficiently, switch to another lock (K then H) and try to find the right tongue position

Notice: the best solution, for this exercise, is to do it with a dry bubbler. But we will learn that in the next document.
By the way, why use the letters N and M for charges?
It's anecdotal, but here's a little game to finish:
Exercice 6 :
-Inflate the dry trainer balloon with your mouth, pinch it, place it on one nostril (the other being locked with a finger)
-open your mouth without letting the air escape (the soft palate is therefore locked).
-Now spell the alphabet slowly without letting any air escape.
-see what happens with the letters N and M…
Solution : it is impossible to spell the letters N and M without letting air escape: these letters imply a soft palate in a neutral position. This explains in particular why a full M charge will make a “pop” in your ears!
To go further…
Once you have mastered all this on dry land, all you have to do is practice in open water
Warning: the mouthfill should not be learned by going at 40m but from 0 to 20-25m with lungd partially empty (FRC) by taking a load on the surface and one towards 5-6m. Once the mouthfill has been mastered, we can test it in FRC with a single mouthfill on the surface, in order to know what theoretical depth it could take us to.
I would like to take this opportunity to recall the rules mentioned in the Frenzel lesson:
Rule 1: NEVER ALONE ! This does not mean that a friend is watching you from the other end of the beach but that he is with you, in the water, attentive to what you are doing, and that he is also able to go down if necessary.
Rule 2: Work on the technique (therefore the quality), and not the duration of the freedive. Especially since it is important to be relaxed. You must therefore be on fairly short freedive times compared to what you would be able to achieve.
Rule 3: control your descent. The best solution is to descend along a vertical cable, pulling yourself with your hands. So without finning. Good news, all freediving clubs have a cable! The advantage is that if there is the slightest problem, you can stop your progress without getting hurt.
Rule 4: An equalisation must always be done gently. Never force! If an equalisation does not work, stop your descent, possibly stay in place for 5-10 seconds to try to get an equalisation to pass (by changing the technique: head position, jaw position, etc., but not by forcing), then in any case stop your dive and go back to the surface.
Rule 5: do not go beyond the last equalisation. You are here to work the technique, not to break a record…
Going further with dry compensation
We will see in our next article how to fine-tune your mouthfill, keep it constant and practice dry handling unforeseen events (increasing pressure, skipping compensation, etc.) using a dry bubbler:
Freediving compensation, advanced level dry training part 2/2: Going even further
- Pierre BOUTEILLON for Deepway
- https://deepway.fr/en
- contact@deepway.fr

Hello,
I would like to receive your articles concerning all compensation techniques
Hello,
Vous trouverez tous nos articles à l’adresse suivante:
https://deepway.fr/en/news/
Vous pouvez également vous inscrire pour être informé des futurs articles à l’adresse:
https://deepway.fr/en/newsletter/
Cordialement
C intéressant