Dry equalisation for advanced level freedivers (2/2)
This document is a continuation of: "Dry equalisation for freediving, advanced level (1/2): Mouthfill"
We saw in that part the basics of dry mouthfill training.
Did you think that once the mouthfill was discovered you would go down to 100m the next day? Nay! Mouthfill is a practice that has to be mastered over years!
The dry trainer allowed you to discover the Frenzel and the Mouthfill (see the 3 previous documents). But to go further, you will have to learn how to dose and be subtle and constant.
Note: We will focus here on improving the mouthfill, but most of the exercises presented are adaptable to the “classic” Frenzel. It’s up to you to be imaginative!
Required accessories:
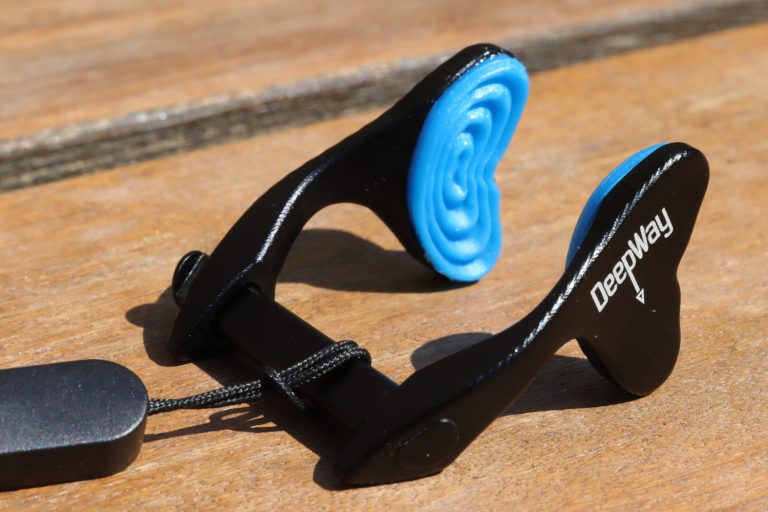
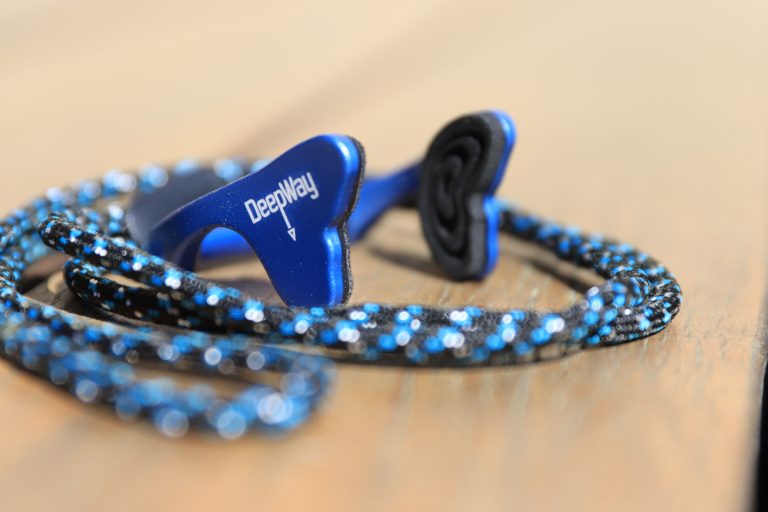
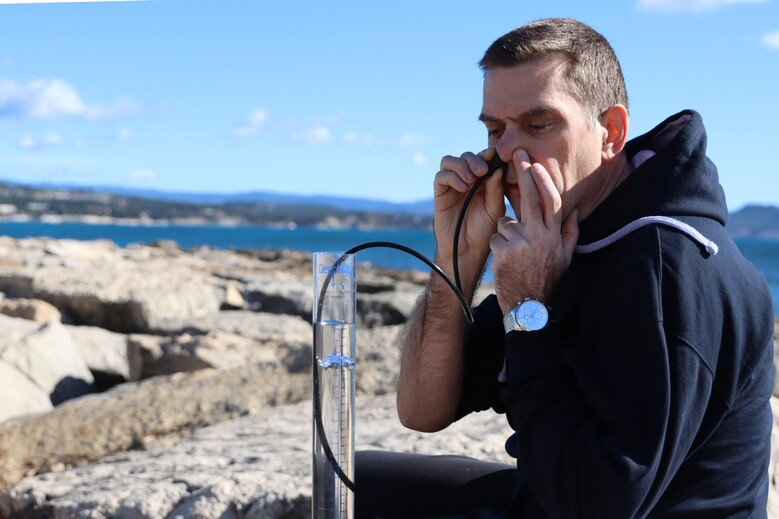
-Dry bubbler
Andrea ZUCCARI (1974-2023)
The concept of the dry bubbler and the water tube were invented by Andrea Zuccari qui nous a quitté l’été dernier (août 2023).
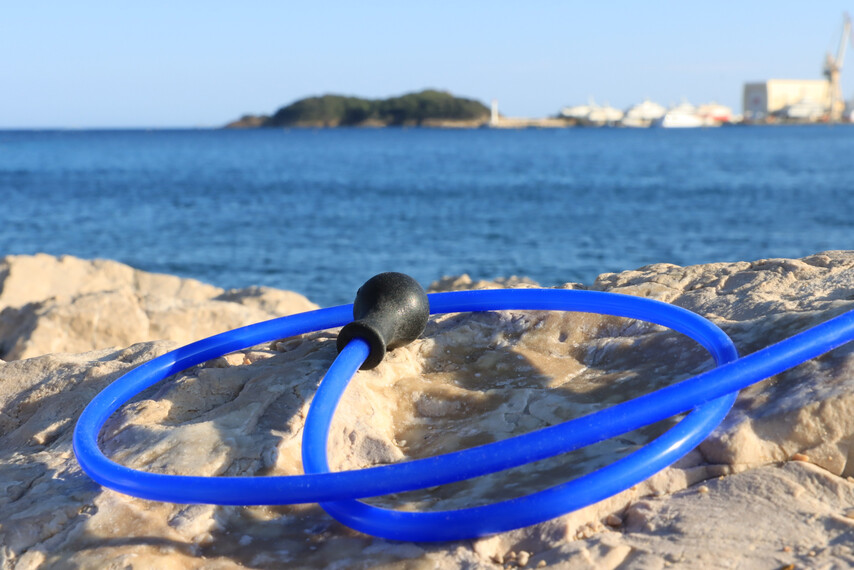
This consists in a flexible hose, fitted with a pierced tip, which is immersed in a column of water 30-40cm high. The lower you place the hose into the water column, the stronger the resistance will be.
The interest is twofold:
- the pressure exerted by the tool is passive (resistance) and not active: the sensations therefore differ, which in training is always a good thing. In addition, there is no excess pressure in the nasal cavity as long as you do not equalise. The eardrums are thus less stressed.
- the simple fact of raising or lowering the base of the hose by 1 or 2 cm in the water column makes the sensations change enormously. We can thus vary the resistance:
- from one exercise to another
- and also during the same exercise, which allows dry reproduction of various moments of the dive (pressure increase, loss of equalisation, etc.)
| NOTE: As I haven't had the chance to do an internship with Andrea Zuccari, these are exercises that I imagined for my personal use. Andrea certainly had others, or made differently. If you have any information, feel free to contact me! |
Learn how to reduce the pressure required to equalise
Do you know how to equalise? Great! But is your equalisation as good as it could be? And most of all, are you sure you have to exert so much pressure to equalise?
We all have, at one time or another, been stuck at a certain depth. The reflex: send more pressure. It’s instinctive but often counterproductive. In reality, the key is generally to compensate not harder, but just… better (relaxation, posture change, etc.).
We will start by quantifying the pressure currently used and the one you would actually need.
Exercise 1
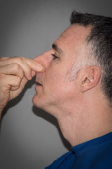
- immerse the hose in 30-35cm of water, place the hermetically sealed tip over one nostril, block the other nostril with a finger, and equalise as you are doing now. Are bubbles coming out? This means that you are currently compensating harder than that (otherwise raise the hose a few cm)
- If bubbles come out, lower the hose a few cm into the water column and start again.
- Go on until you find the depth (with an accuracy of approximately 1cm) at which only one or two small bubbles escape. If necessary, raise the hose a few cm to adjust.
Warning: do not modify the intensity of your compensation during this exercise!
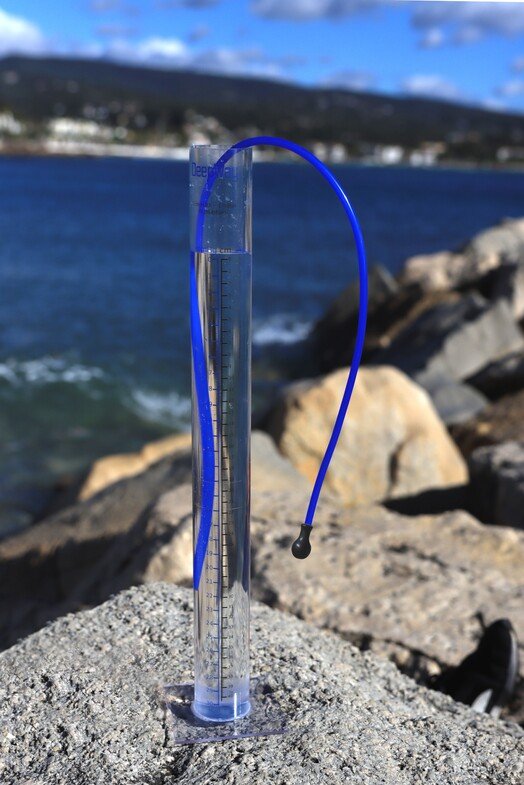
- Once the right depth has been found, make a small mark on the tube to identify the depth at which your hose was located (a piece of adhesive for example). Then measure the distance between this point and the surface of the water (in cm) and multiply the result by 0.735.
| Pressure (in mm of mercury) = water column (in cm) * 0.735 Ex : 30Centimètres d’eau correspondent à 22.0662Millimeters of mercury |
Notice: if you are the “rough” type, the height of your column may not be enough. Then repeat the exercise with a longer column of water… or in a swimming pool!
Result :
- It is not uncommon for a beginner freediver (or a scuba diver using Vasalva) to equalise at a pressure of 50mm of mercury (=68cm of water!), or even more. Poor eardrums...
- 8 to 15mm of mercury is the most common range for freedivers who already have some experience.
- some “pure” BTVists will barely need to dip their hose, the slightest resistance being enough to equalise.
Exercise 1 (continued)
- Go for a 10 minute walk to forget the previous exercise, then do the exercise again in 25cm of water. Equalise VERY gently this time, until 2-3 bubbles escape the hose.
- If, when the bubbles escaped, you didn't notice anything in the ears, start again by placing the tube 2-3cm lower
- At some point, you will feel a “pop” in the ears just before the bubbles come out. Note and measure this depth.
Result: it is very likely that the measured value is much lower than the previous one. Maybe even the half? This is how much pressure you actually need to equalise (more precisely the pressure delta)
Repeat the second part of the exercise a few days later (without performing the first one) to confirm the value. It is even interesting to repeat the exercise several times a year, because if you practice regularly it is likely that you will notice a difference between the start and end of the season.
If during the previous exercise you were above 20mm of mercury, this exercise is ideal to reduce gradually the pressure actually needed. Your eardrums will thank you!
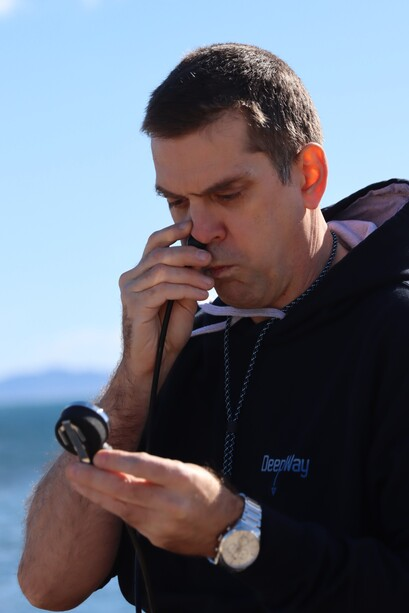
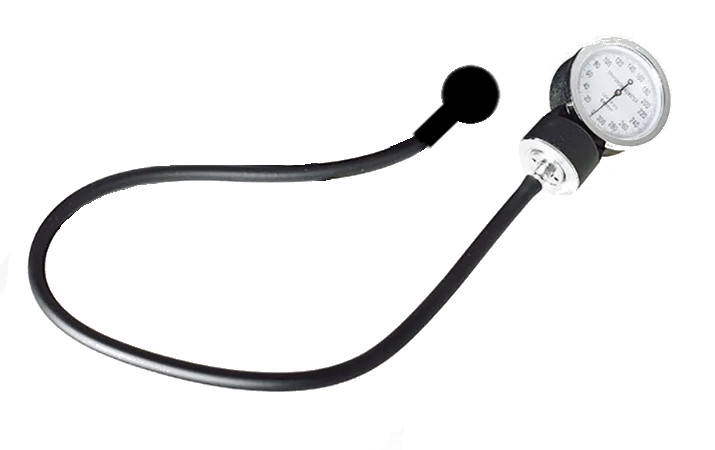
Trick: you can also adapt the pressure gauge of a sphygmomanometer (the stuff that doctors put around your arm to measure blood pressure) on your dry bubbler and thus directly read the pressure produced by your compensation
Learn how to be consistent when freediving
Once this new equalisation pressure has been determined, it will have to be automated
Exercise 2
Place the hose at the depth determined previously, and make series of equalisations ensuring that the back and forth movements of the bubble are as regular as possible:
- regular speed of rise and fall of the bubble
- high point and low point of the bubble as regular as possible
Work gently and as relaxed as possible. The first few times, it will certainly require a lot of concentration. The goal, over the sessions, is for this to become as automatic as possible.
Variant : If you practice often or if you have a session lasting more than 30 minutes, raise the tube 1 or 2 cm during most of the session, in order to relieve your eardrums. Only come back down at the end of the session.
Exercise 2 B
Same, but with a single compensation. Maintain constant pressure for 20-30s. The air bubble must be at the edge of the outlet and move as little as possible.
Notice: In this exercise, the eustachian tubes are kept constantly open (or close to being open), and without jerking. it is therefore a very good exercise for:
- the voluntary tubal opening (VTO)
- the Frenzel handfree
- the mouthfill handfree
Mouthfill: Learn the continuity of piston advance
The goal is to work on the piston movement of the tongue, with the greatest possible regularity.
Exercise 3
with the hose placed 3-4 cm above the equalisation depth, equalise (load T, K or H) by making bubbles as regularly as possible:
- avoid bubbles clusters
- avoid lasting several seconds without any bubble going out
The interest is twofold:
- Regularity (the important thing is the regularity of the bubbles, not the movement of the tongue!)
- Managing the “end of travel” of the piston (the most delicate part to manage, and which can make the difference between turning 5m before the tag or reaching it!)
Exercise 3B
Same, but by chaining T locks, then K then H locks in continuity. We therefore add two difficulties:
- smooth transition from one lock to another
- The regularity of results from one lock to another (the movements are not the same from one lock to another to obtain the same result)
Notice: these 2 exercises (3 and 3B) can be parcticed with an N load (“classic” Frenzel) and M (Mouthfill). But they obviously take all their interest in the mouthfill
Freediving freefall: Learn to manage the unexpected
Let's say you make an equalisation every 2m, with metronome regularity. At some point, an equalisation does not come through. The following equalisation must therefore be carried out:
- without stress
- by exerting slightly more pressure, because the pressure delta between middle ear and mouth has slightly increased
We will work this dry:
Exercise 4
With the hose placed 3-5 cm above the equalisation depth, equalise by making regular bubbles, as before. Then start playing with the depth of the hose (a little lower, a little higher…). The bubbles must remain as constant as possible.
Exercise 4B
Same, but with your eyes closed, with another person holding the hose for you and varying it without warning you. If you have young children, I’m sure they’ll love it!
Dry simulate a complete freediving descent
Once all the previous steps have been mastered, we put everything together to simulate complete freedive.
Notice: We will not do full M loads here, in order not to hurt your eardrums. The important thing is to try to reproduce a feeling as close to reality as possible (so a load producing a tension in the mouth close to what you would feel at 17m, with 2.7bar of ambient pressure, and not what is achievable at 1 bar!). Likewise, given that you are not producing any physical effort, you may have to adapt the times in order to have a feeling as close as possible to what you would feel in the water. For example, if you start to have spasms at the bottom, plan for an apnea that takes you to the first spasms.
Exercise 5
Try to time each section of your freedive, in order to reproduce it dry with a dry bubbler. For example, for a 50m mouthfill freedive based on a speed of 1m/min, you would get:
- Start of the dive. Lightweight mouthfill. We bubble regularly.
- 15s later (i.e. at 15m), new M charge.
- from 15 to 50s, the space in the mouth is reduced little by little (this feeling is simulated by regular bubbling), the ideal being to arrive at an almost empty mouth after 50s
Exercise 5B : the same, but adding as many mental references as possible. For example :
- I imagine the finnings whose intensity gradually reduces, then the free fall around 20m
- 18m, I imagine crossing a thermocline
- 35m, I am in residual volume and it stresses me out. Especially since a second thermocline is arriving.
- 40m: I miss an equalisation (I dip the hose a few cm for the next equalisation, then raise it again)
- 45m: the volume of the mouth is almost at its minimum. I try to stay consistent.
- 50m: I catch the tag. I am happy.
Don’t hesitate to be inventive!
Notices:
- You can diversify with different descent times (e.g.: 1.2m/s with a monofin, 0.7m/s without fins, etc.)
- You can alternate frenzel and mouthfill descents
To go further…
It is certainly possible to imagine thousands of variations with a dry bubbler. That's the whole point of this accessory. So what will be yours?